|
Post-processing: OrcaFlex spreadsheet |

|
Post-processing: OrcaFlex spreadsheet |
The OrcaFlex spreadsheet enables you to automate the extraction of results and data from OrcaFlex files into Excel. OrcaFlex spreadsheets also provide facilities for automating the production of batch script files and text data files.
For results post-processing, an OrcaFlex spreadsheet contains one or more instructions worksheets, plus other worksheets to receive the OrcaFlex results and for any derived results. The spreadsheet also provides tools to help build the list of instructions. These tools are the instructions wizard and the duplicate instructions form.

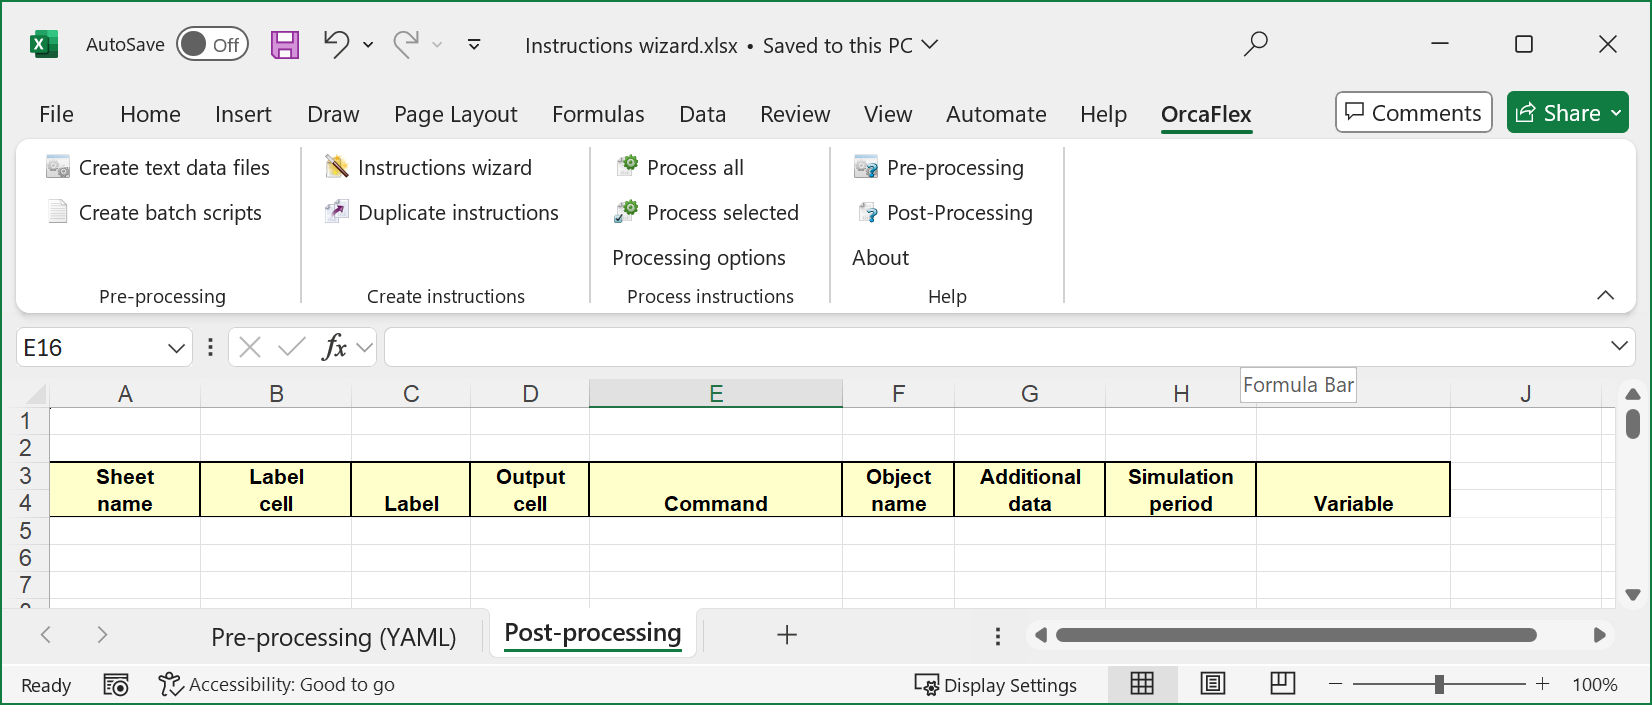
| Figure: | Empty instructions table |
Each row in the instructions table is a separate instruction. The instruction can be thought of as 3 separate sections:
You may complete, independently for each row, one or both of sections 2 and 3. That is, you can have an instruction that has a blank command cell and so only writes a label, or one that has a blank label cell and so only writes results.
The end of the table is indicated by the first row that has blank label cell, label and command columns. Hence you cannot have an instruction row that has no label and no command. In particular, you cannot have a blank row in the middle of the instruction table. Also, the spreadsheet assumes that the first instruction is row 5 of the worksheet, so do not insert or delete rows above this.
Any formatting is ignored, so you can use bold, italic, colour etc. to make the worksheets easy to read. Instructions in hidden rows in the instructions table are not applied, allowing you to effectively disable certain instructions. This can be useful when developing and building the table.
| Warning: | Do not change rows 3 and 4 of an instructions table, since these are used to identify it as such. |
In an OrcaFlex spreadsheet, OrcaFlex integrates with the Excel ribbon as shown above.
The process all instructions command runs all the instructions in the table. If the currently selected sheet is not an instructions sheet and the workbook contains more than one instructions sheet, then you will be asked to select which instructions sheet you wish to process. The process selected instructions command tells the spreadsheet to process only the instructions in the currently selected cell or block of cells.
The processing options ribbon button allows you to change the way an instructions sheet is processed. Click on this to bring up the available options.
If an instruction depends upon the result of a previous instruction, i.e. one of the cells in the row is a reference to the output of an earlier instruction, then the contains dependencies box must be checked to ensure that the whole sheet is processed row by row from top to bottom using a single thread. If this box is not checked, then the order in which instructions are processed is not defined and multiple rows may be processed simultaneously by multiple threads. If this box is checked, then you can choose to either allow errors to be reported during the processing or to ignore errors until the sheet is completed. If ignore errors is checked then all error messages are collated while the spreadsheet continues to process instructions. These are then reported on completion.
The thread count can be set to reduce the impact processing spreadsheets will have on the responsiveness of your computer. By default the spreadsheet will utilise all the available processing cores. It is only available if contains dependencies is not checked.
| Note: | When a spreadsheet is processed in an OrcaFlex batch all the option settings are ignored apart from "contains dependencies". Errors are always ignored until processing completes and the number of threads used is controlled by OrcaFlex. |
Sometimes it is convenient to be able to invoke the post-processing actions from VBA. You can do so like this:
This is equivalent to pressing process all. To invoke the process selected command programmatically, use the ProcessSelected method:
Finally, the processing options are controlled by means of the following properties:
The OrcaFlex spreadsheet is implemented as an Excel add-in. Sometimes, for example after an Excel crash, the add-in can become disabled and needs to be re-enabled. The method for achieving this differs depending on the version of Excel.
In addition to the instructions above for re-enabling the OrcaFlex add-in, Excel 2013 may require additional steps to get the OrcaFlex add-in tab to appear. Excel 2013 sometimes changes the start up behaviour of the add-in if a problem has occurred while the add-in was loaded, this results in the OrcaFlex add-in tab not appearing when an OrcaFlex spreadsheet is opened. The load behaviour of the add-in is determined by a setting in the Windows registry. The registry key and setting are:
The data for this setting should be 3 (which is load on start up). Sometimes this key is under HKEY_LOCAL_MACHINE rather than HKEY_CURRENT_USER. Make sure that Excel is not running before modifying this setting.
The above instructions refer to what Microsoft term hard disabling. If the above actions do not resolve the problem, then it is possible that the add-in has been soft disabled instead – the instructions for re-enabling are as follow: